Jam Label Design

Berry season has been “in” for a while now, with strawberries starting the cycle, followed by blueberries, raspberries, gooseberries and currants – and soon our major berry crop: blackberries.

We’ve been using the berries for jam as they ripened and this year we splurged on the glossy round labels that “Avery” makes.  Their online design software is completely flexible and lets you design your own label from scratch, or you can modify existing templates.

We also had a lot of fun looking for fancy label ideas on Pinterest and added a new “Glammy Jam” album.

Wineberries?

One of the “must have” bramble varieties for a budding winery has to be the wineberry – Rubus phoenicolasius, also called Japanese Wineberry, or Wine Raspberry (see Wikipeadia for more info)  It is a native species in China, Japan and Korea and was introduced to North America in the late 19th century for breeding new hybrid raspberry varieties.  These berries are very tasty, with a more intense raspberry flavor than raspberries themselves.  Wineberries are sweet but also tart, and the higher level of acidity is what makes them so good for jams and for wine.

Wineberries now grow wild in parts of the United States, primarily in the Appalachian Mountains – and they certainly grow around our region!  They are commonly found  along the edges of fields and roadsides, but are not widely cultivated.  Actually, wineberries are considered an invasive weed in many states, including Pennsylvania.There is a great blog post on the Cumerland County Extension website about wineberries.

What makes this type of bramble so unique is the way that the berries ripen inside a calyx – a remainder of the flower.  The calyx folds back as the fruit reaches maturity and a shiny, slightly sticky and very tasty berry emerges.

Despite the fact that these berries are not widely cultivates, we dug some out this weekend and planted them in a new row, next to a row of red raspberries.  We’ll see how cultivation affects these berries.  Hoping that we can contain them in a neat row and that they bear a lot of fruit.  Can’t wait to make some jam and maybe some wine as well.

Berry Patches Revived

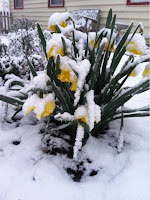
Despite the unseasonable cold weather (and snow), we managed to get a lot of work done on the farm this weekend.  The most important task was to plant the remaining 100  Niagara grapes – so that plot now has 150 grapes in about .5 acres.

We planted 14 new blueberry bushes, slightly enlarging the patch near the barn, and replacing some of the previously planted bushes.  We also applied aluminum sulfate to the blueberry patch, to keep soil acidity low in order for the bushes to thrive.

Our strawberries started shooting leaves over a week ago and the colder weather has not slowed them down.  We cleaned up the patch and then covered it with straw, letting only the new leaves show through.

The elderberry patch also got a good “thinning out”.  They need to be pruned almost like brambles (just not as often).  Old fruiting canes need to be removed so that new canes can grow and bear fruit.  And yes, we are still cleaning up and pruning in the blackberry patch – just two more rows to go!!

Dried Apples

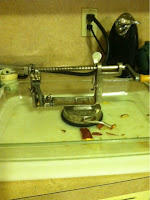
We made absolutely delicious dried apples in our dehydrator today – and it was the easiest thing to do.  We used the apple peeler to peel and slice the apples – this way the slices were of a very consistent thickness.  We placed the slices on the trays and sprinkled them – lightly –  with a sugar/cinnamon mixture.  It took about four hours until they were dried…and delicious.  We ate half of them this evening already.  What a treat!!

Making “Fruit-leather”… and Jerkey

Samantha got us a “kick-ass” dehydrator for Christmas. The first thing Jeff made in it was – of course – deer jerky, which turned out great.

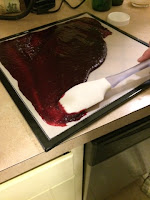
But then we experimented with making fruit leather – the fruit roll-up kind of snacks.  We thawed out some of our seedless blackberry puree (the same kind we use for making jam), and then cooked it with SureJel and sugar, only we used more than twice the amount of fruit than the jam recipe calls for.  This thickened the puree enough to be able to spread it on the trays of the dehydrator.   I should mention that we got non-stick silicon sheets for the trays – which was very helpful.

We also spread out some of our homemade applesauce on two additional trays.  We let the fruit dry for about 8 hours,then peeled them off the sheets onto a cutting board.  We then sliced and rolled up the dried fruit puree.  They turned out really well, more tart than sweet, and absolutely delicious!