Starting Vines from Cuttings – An Experiment

Last year we had purchased a small grape starting kit at a trade show – it contained paper tubes, filled with dry starter soil and a crate covered with plastic. We had never done this before, but we did take  late cuttings off some concord grapes, and out of the 75 plants we started, about 50 were alive and well by the fall.  (Not so sure if they will make it through this rough winter – we’ll have to see).  This was not such a difficult task, so our plan is to try the grape propagation on a larger scale.  There is a lot of detailed information available on the internet, here is one of the useful sites.
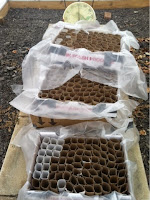
Over the winter we started collecting the cardboard tubes inside paper towels, toilet paper and gift wrap (friends and family helped with this project).  This weekend, Jeff and Sam assembled our starter boxes:  they used flats that usually hold berry boxes, lined them with heavy plastic, and then stuck the paper tubes as close as possible into the flats.  Turns out that each flat holds about 90 of these tubes.  They filled up a lot of boxes, with enough tubes for about 800 cuttings!
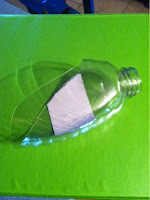
Jeff then found a plastic jar with an opening that was just right to fit inside the paper tubes – it was a honey container, which he “transformed” into a scoop.  Once we are ready, we’ll moisten the potting soil and then fill up each tube, and a perfect cutting from the “mother” grape vine will be dipped in rooting hormone, and then placed in the tube for growing.  The point of the tubes is to maintain the fine roots, and not to get them tangled up between different vines.
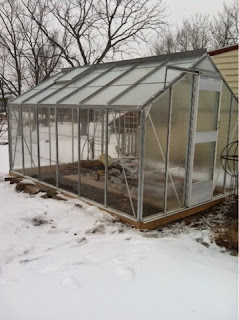
For the first few weeks, we will keep the flats with cuttings on a heating mat inside the house, but as soon as the first leaves emerge, we’ll move the boxes into the greenhouse. The greenhouse is nearly ready, and even without a heater in it, it seems to reach a temperature between 40° – 50° F during sunny days.  We still need to build benches and run a waterline/hose.  As soon as it gets a bit warmer, we will move barrels into the greenhouse and fill them with water to maintain a more constant temperature.

Greenhouse Installation

It has been a while since we purchased our greenhouse (see previous post).  We finally had time to actually set it up in it’s permanent place, i.e. in the herbgarden in front of the house.

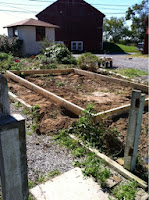
We started by clearing the space, measuring out the dimensions and marking the four post holes. We used the posthole digging attachment with the tractor to make the holes.

Next we cemented the four corner posts and let them settle overnight.  The next day, we build the frame that would anchor the greenhouse, leveled it and started filling it with gravel.

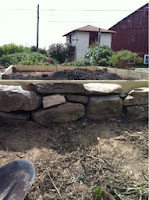
In order to keep the greenhouse level, we had to really built up the back part of the plot.  We used field stones from an old stone wall to build a retaining wall, and back-filled with gravel and dirt.

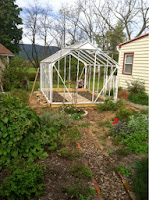
Once the frame was solid, and the inside filled with gravel, we laid down large cement platters for a center walkway.  After that is was just a matter of carrying the greenhouse frame (no glass yet) and securing it to the foundation.

Next step:  installing all the glass panels, the door and the louvered windows…