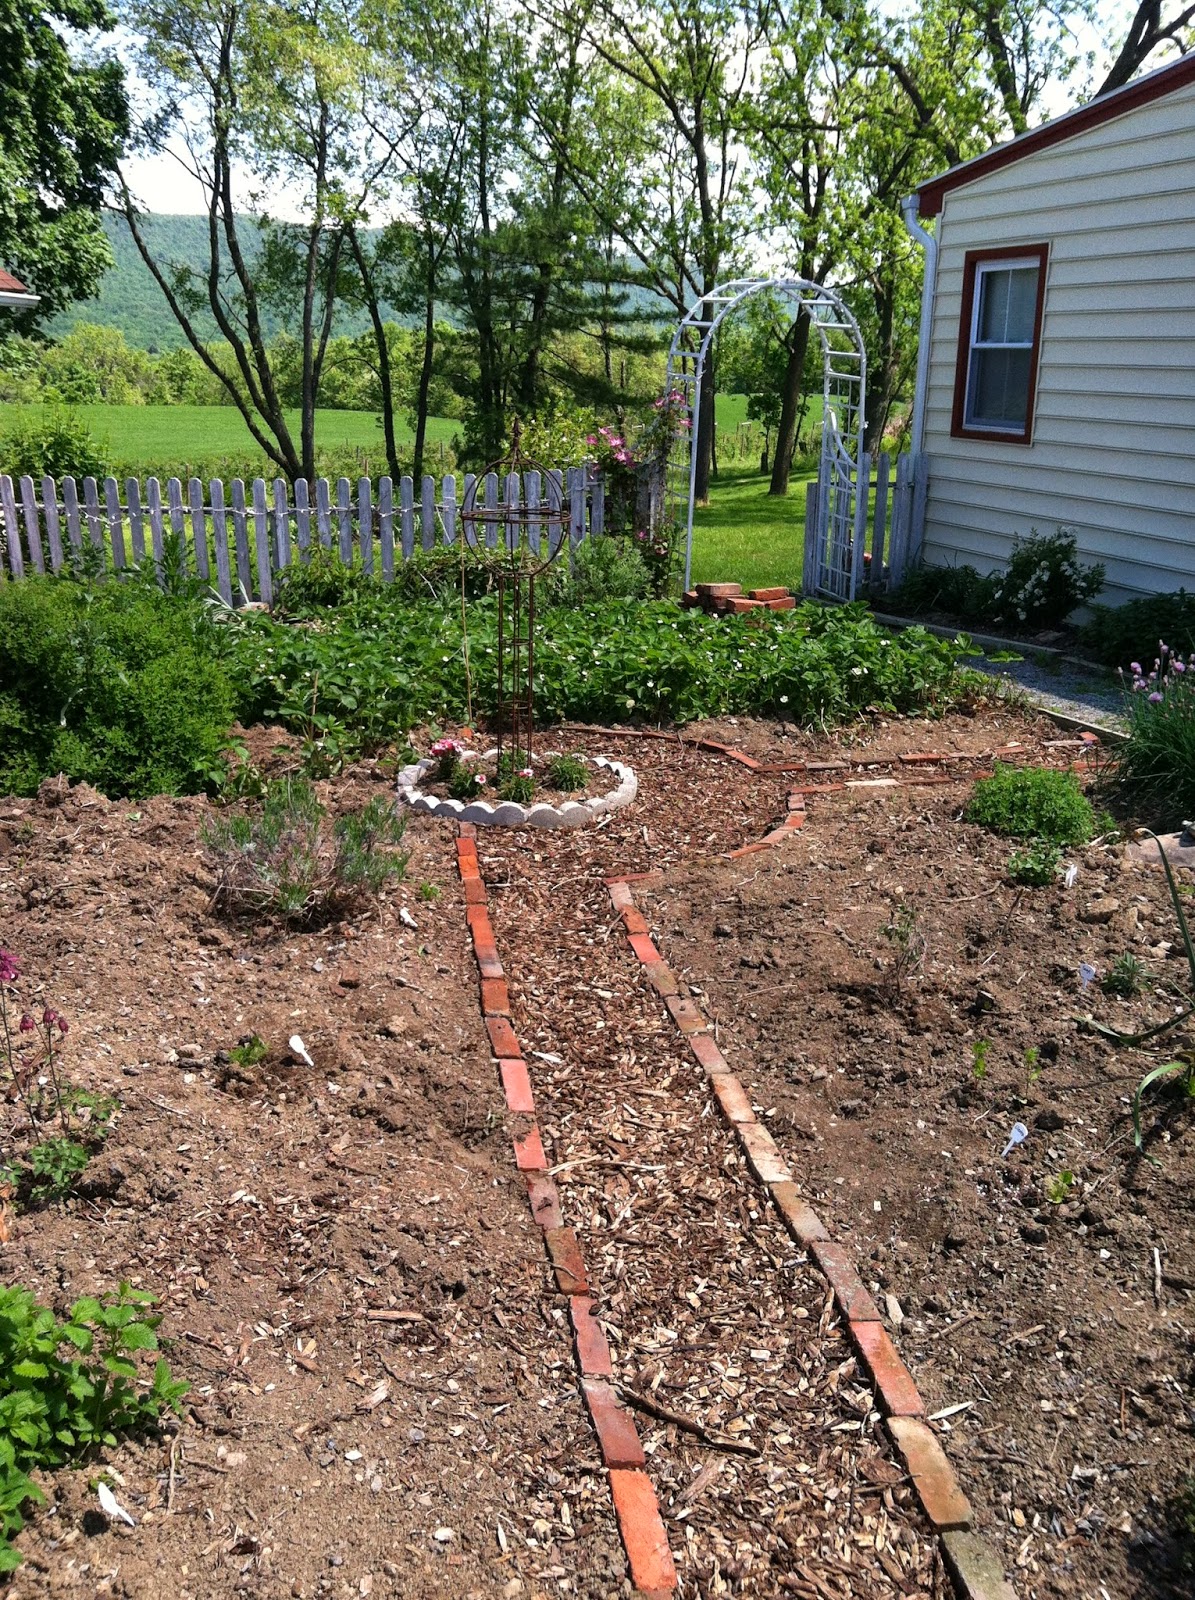
Updated Herb Garden Layout

Since we installed the greenhouse in the middle of the herb garden last fall,  the former layout of the garden was completely off center.  This weekend, we finally too some time to re-do the herb garden paths so they actually lead to the greenhouse door.  It took quite some digging and moving dirt, but the end result was worth it!  We now have  much broader paths to reach the greenhouse, and still plenty of space for herbs.

By the way, the very cold winter did kill some of the more tender herbs, like the large rosemary we had for three years.  But we already planted new rosemary, and replenished the parsley (curly and flat).

We also added the old tractor part as “yard art” to the herb garden. We found this in one of our fence rows during spring cleaning and had to move it with the tractor – since it is so heavy.  It sort of resembles an over sized bundt cake pan!  We placed it on an old tree stump and will fill it with colorful summer flowers once it gets warmer!

Mulching the Herbgarden

I was gone for nearly a week and the weeds had taken over my herb-garden.  After a very thorough weeding and hoeing, the reward was to spread a thick layer of mulch.  What an improvement:

Herb Garden Make-Over

It all started with a visit to the annual Plant Fest & Sale of the Cumberland County Master Gardeners at the Extension Office.   The Extension Office has a nice little herb garden as a demo – which provided some ideas for the make-over plan.  The plant sale featured a lot of herb selections as well as native plants.  Here is what we bought:

Our existing herb garden already had a nice selection of herbs, but it was missing structure and a focal point.  After seeing the demo-herb garden, we realized that what we really needed was a path.  We had a stack of old bricks and a fair sized pile of wood chips – which together were the prefect start for a path.

We used string and a tape measure to find the exact center of the existing herb garden, and marked out a circle.  From there we marked out the paths, and then started digging about a foot deep.  Several existing herbs had to be dug up for transplanting, as did some of the strawberries, which still take up half the herb garden space.  
Once the circle and paths were dug out,  they were lined with bricks, and then filled in with wood chips.  The center of the circle was marked by four curved pre-formed cement sections (which we happened to have lying around as well).  
We planted flowers in the center of the circle and stuck in one of our ‘yard-art’ pieces and then planted our herbs, marking each one.  
This project started Saturday around lunchtime, and was finished before dusk on Sunday.  (Not too bad for Sammy and Tina) 

Spices and Herbs

Managed to get one more good cutting of herbs today, before starting to weed the herb garden:

  • 2 huge bunches of peppermint
  • 2 bunches of thyme
  • 1 big bunch of rosemary
  • 1 bunch of oregano
  • 1 big bunch of sage
Fresh herbs hung up to dry in the kitchen

We also made a batch of spiced apple wine – the recipe called for cloves, broken up cinnamon sticks and shredded ginger root.  Can’t wait to see how this will turn out – may we’ll have it ready for next year’s Thanksgiving holiday.  In the meantime, I am making do with mulled hot cider – actually sipping it right now and it is delicious!

Coughdrop Jelly – Herbal Harvest Part 2

This afternoon our herb harvest and processing continued.  We cut bunches of oregano and hung it up in the kitchen to dry.  This should be done in time for spaghetti sauce making.  Also harvested some of our mint and tried a new recipe:
Orange Peppermint Jelly

  • 2 cups peppermint leaves
  • 4 cups orange juice (I used juice from concentrate)
  • 8 cups sugar
  • 1/2 cup freshly squeezed lemon juice
  • 1 six ounce pouch of liquid pectin

Place mint leaves in medium bowl.  Using a large stainless steel pot, bring the orange juice to a boil, and then pour juice over mint leaves.  Let this steep for about 30 minutes, then drain through a fine mesh sieve, squeezing out remaining juice from the mint leaves.  Discard leaves and return liquid to large pot.  Add sugar and lemon juice and bring to boil, making sure all sugar is dissolved.  Stir in pectin and bring to a full rolling boil.  Boil for one minute – mixture will foam a lot! (hence the large pot).  Skim off foam and ladle jelly in to prepared jars. (Jars need to be washed and hot – inserts need to have been placed in simmering water to soften the rubber).  Wipe jar rims, adjust lids and process in boiling water bath for 5  minutes.

I let Lars taste the skimmed off foam – which had set nicely before the water bath even came to a boil.  His reaction was that the jelly tasted just like cough drops!  While this is true, it is not at all a bad taste, rather sweet, with a lot of citrus and mint, just like the ingredients.  Almost like a minty lemon curd.  We’ll see how this tastes in the middle of winter – we’ll be sure to put it on Lars’s toast whenever he gets a cold.