Bathroom Remodeling – Week 6

And we have progress!!  The whirlpool tub is totally installed, all the plumbing and the electric pump are hooked up and it works!  Not that anything surrounding the tub is finished yet, but Jeff did take a bath this evening 🙂

We also got all the wiring finished in the bathroom, and some of the lights are installed.  This is very helpful for working at night – working with the shop/job lights was getting old.

In the meantime, the guestroom wall is completely finished and now has its first coat of paint.  We decided to not simply paint the new wall a matching shade for the room – rather, we decided to completely redo the room.   Sammy helped to pick out the colors – which is always very reassuring.  The room is taking on a completely different look and it is so much fun to see this transformation.
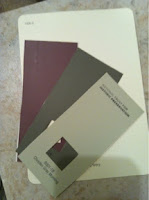
The colors we chose are a rather muted dark green, a grayish light green and the same dark purple color we have in the barn.  All this is set off with a soft, very warm white for the trim.  We decided that the guest room, the laundry area and the bathroom need to use the same color scheme, just re-arranged, so that the transitions work well.

The bedroom – at the end of the weekend –  has a dark green accent wall, and will have dark green below the chair rail, with the light green above.  Purple is the accent color which we will pick up in the sheets, the quilts and other accessories.  All the moldings, doors and windows are trimmed with the warm white.  It looks very calming.

Posted in DIY

Bathroom Remodeling – Week 5

This seems like the never-ending project (mostly because we only have a few hours each week to really dig into this).  But there is definitely slow progress.  This week, Jeff and Lars got more waterlines run, both showers, the bathtub and the sink now have access lines.  They also ran all the electric lines, and some of the outlets and switches are actually installed.  They also cut pieces for the sub-floor and got those nailed down.

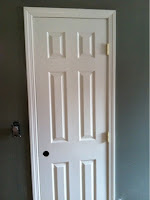
Jens came on Saturday and helped put up the ceiling drywall in the bathroom, and the drywall for the wall between the bathroom and the laundry area.  The bathroom door also got installed (which means we have CONTAINMENT of DIRT).  The guestroom wall and closet got another coat of joint compound and all the seams of the newly installed drywall have been “mudded” as well.  This week, we hope to get the rest of bathroom walls drywalled and maybe start building the frame that will hold the whirpool tub.

Posted in DIY

Bathroom Remodeling – Week 4

This project is taking longer as we keep “improving” the design.  This week Jeff decided that it is totally foolish to have a double sink without having two places to take a shower.  So in addition to planning water lines for a shower in the bathtub, Jeff and Lars are now running lines for a corner shower unit.  We picked that up at Lowes today – while buying missing plumbing fittings.

Another improvement is the “grandchild switch”.  Jeff actually installed a three-way light switch by the door, one at regular people height, and one at toddler height.  (We know they don’t like to pee in the dark).

The guest room closet now has the access to the crawl space below the house, as we could no longer keep the existing access in the bathroom – due to the new corner shower.  We finished hanging drywall in the closet, an added a coat of joint compound.  The guest room wall was sanded and got its second coat. 

There is still some more wiring to be done, but at least the missing bathroom wall is now installed, complete with the door opening.  Hopefully this coming week, we’ll get drywall up on this wall and get the door hung – so the dirt is more contained!

Posted in DIY

Bathroom Remodeling – Week 3

Finally it looks like we are making some progress: this weekend we hung the drywall on the guest room wall, studded in a small closet, installed the door and added moldings…and got the first coat of drywall mudd on the seams.

During the week, Jeff and Lars pulled out all the old plumbing and wires, and removed the smaller wall near the dryer. Two interesting facts came to light:  someone had “patched” the copper plumbing with a piece of iron pipe – no wonder the downstairs bathroom water always had that annoying iron taste in it.  Every DYI 101 show explains that those two metals should NOT be mixed.  They also found a wire above the ceiling which was wrapped around a rafter near the outside wall.  Jeff used his electric tester, and it turned out that this wire is connected to the “mystery switch” by the kitchen door.  We think that at one time, there was an additional outside light by the far corner of the house, controlled by that switch.  We are considering bringing that light back, or else installing a lamppost by the herb garden.  Possibilities…

They also chiseled out all the broken tiles on the bathroom floor (using an air hammer, which supposedly worked amazing), and cut out the wood floor, which had been part of the closet.  Now the floor is bare, except where we are keeping existing tiles, and the foundation 2×4 has been installed where the new wall will be placed.   Coming up for this week:  installing the new water lines, which have to run through this new wall into the crawl space and connect to the sink and new bathtub.  Hopefully running the electric lines as well, so the wall can be built.

Posted in DIY

Bathroom Remodeling – Week 2


We got the old bathtub out today – along with all the tiles that surrounded it.  Jens came over to help us with the heavy lifting and precision sawing to remove the 2×4’s.   The water to the bathroom is now obviously disconnected, and half the walls and the doorway are gone.  The copper pipes that led to the bathtub are pulled out as well.

We still have to remove a small wall by the sink, as we are going to put a larger sink into that spot.  But our next steps involve wiring and plumbing, which currently run through that small wall.  This will be more time consuming – but not nearly as dusty and dirty!

Posted in DIY