Wooden Trellis Innovation

To date, most of our vineyard is trellised with wooden posts – which has a major disadvantage when compared to metal posts:  metal posts have “build-in” brackets that make it very easy to move the catch wires to a higher level as the grape vines grow and get longer.

Jeff decided to make his own system to allow us to move the catch wires:  he cut metal strapping (the lighter weight, about 28 gauge) into short section, containing 3 holes.  He then bent this short section into a U shape.  He made a lot of them – coffee cans full of them.

To each U shape, he inserted a weather proof drywall screw and we screwed them onto the fence posts, about 6″ above the fruiting wire for the first one, and the second one about 12″ higher.  Two on each side of every post.   We used long, galvanized nails to closed the “bracket”, to hold the catch wire in place.

It worked like a charm –  we already moved the catch wires to the second level on nearly every variety.

More Excavating and Barn Clean-up

This was a good weekend for spring clean-up work.  We had someone come in and remove all the accumulated metal “stuff”.  All that is left to move now is the old silo.  We also took time to clean up around all the sheds and the barn and we moved more things out of the barn (like the row boat and trailer).

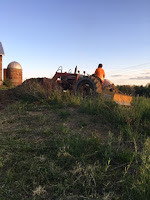
Over the past couple of weeks, Zach has been getting rather good at using the grader attachment for the tractor.  He graded a section of the  old “barnyard” that desperately needed cleaned up;  and he started moving piles of dirt around in what will someday be the parking lot below the barn.

While Zach was moving dirt, Tina found a spot of wineberry plants, which we dug out and moved to the garden before the tractor would destroy them.

Sugaring Weekends

Jeff had the brilliant idea to try and make his own maple syrup ever since he saw the sugar maple trees on Zach & Rachel’s Farm.  So he researched the process in more detail, ordered the necessary supplies (tree taps, hoses) from Amazon…yes, they have that too! And we bought some more food grade buckets with lids.  Then Jeff and Lars tapped 5 trees, hooked up the hoses and started collecting sap in the 5 gallon buckets.  They checked the buckets every day and over the course of 2 weeks collected nearly 100 gallons of sap.

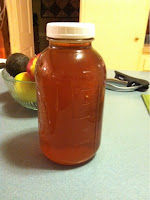
The first weekend we used our pig roaster, which has a stainless steel trough, to boil down the sap until the 50 gallons were reduced to about 3 gallons.  We transferred the 3 gallons to our largest stainless steel pot and reduced those even further, to about 4 quarts.  We used a thermometer to measure the exact temperature of the sap at all times.  Our water boiled at 211 F, (we double checked it to calibrate the thermometer), and we boiled the sap until it reached 218 degrees.  After this, we transferred the syrup into 2 half gallon jars and let it cool down and settle, to allow the clear syrup to separate from the “sand” (the left over mineral residue).  We used our wine equipment to “rack” the clear syrup off the residue.

The following week, we collected the sap more frequently, and all of it was boiled down in our large pot.  All that yielded another gallon.

A New Spot and New Use for the Food Dehydrator

We have not put the food dehydrator away, since Christmas!  It is used several times a week and thus has been taking up a lot of my kitchen island space.  We finally decided to move the small wine-rack out of the kitchen (who needs a SMALL wine-rack anyhow) to create a permanent spot for the dehydrator.  Luckily we found a clearance kitchen cabinet a Lowes – exactly the right dimensions – and voilà… we have a dehydrator spot

The latest and greatest use of the food dehydrator?

Drying home-made noodles!

Posted in DIY

Hallway and Bedroom Makeover

We took advantage of the vacation time between Christmas and New Year to finally paint our hallway and give our bedroom a makeover.  Both areas still had the original paint from when we bought the house: the bedroom was orangy/mustard kind of shade, and the hallway was an off white. All the rooms had a flat finish, which was impossible to keep clean, and the and window frames were a bright white.


The new hallway is now painted in a shade called “spiced vinegar”, which is from the natural color palette  by Olympic paints.  Pretty neutral, but welcoming.  The trim in the hallway is a warm, off-white shade that matches the trim in the rest of the house.  We chose a semi-gloss finish and are really happy with the end result.

Our bedroom was the biggest improvement.  We used a green shade, called “Sweet Annie” (namesake  of the herb),  for the walls.  All the moldings and window frames are painted in “Toasted Almond”.    (We had already used the “Toasted Almond” for the walls in the master bathroom a few years ago).   Both of those colors are also from Olympic paints – from their traditional color palette.

Before
After

Posted in DIY